Remember the days when you were a kid and kite flying was one of life’s pleasures? It’s a simple structure—or perhaps not so simple, but something that is basically made of paper or fabric, wood, ribbon, and string. It catapults you back to childhood and can bring out the fun-loving kid in everyone.

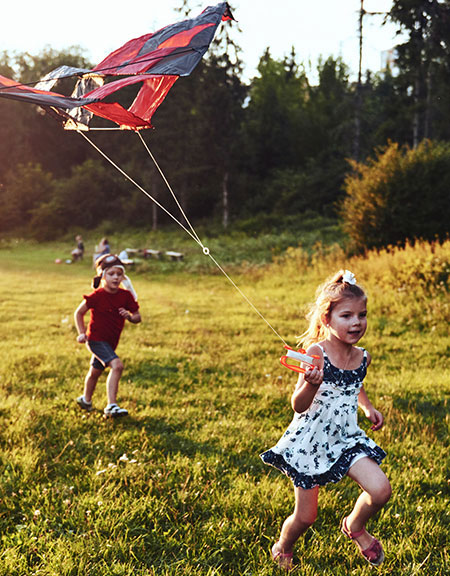
Kite flying is a great way to connect an entire family to a spectacular breezy day in open fields, meadows, hilltops, and other picturesque places in the Hudson Valley.
The origin and purpose of the first kites flown thousands of years ago, even 1,000 years before paper was made, was to lift offerings and give thanks to the gods for good harvests, weather, and prosperity. Although it’s said kites were first made in ancient China with silk and bamboo, other lore tells of kites being crafted from leaves over 3,000 years ago.
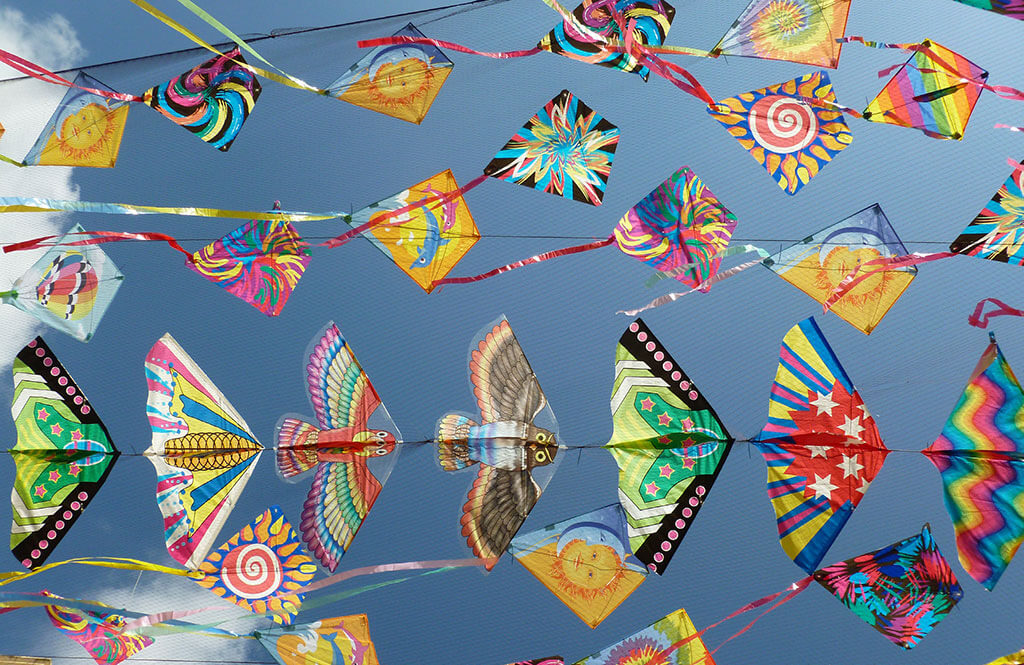
But whatever flies-your-kite, this primordial creation has yet to be upstaged by a video game when it comes to easy outdoor fun. And kitemakers have become increasingly creative as the sands of time have been whisked away. In addition to the classic designs of our youth, there are now stunt kites, in-the-wind competition kites, and kites in myriad shapes and sizes.
Would you believe the largest kite on record created by New Zealand kitemaker Peter Lynn and validated by Guinness is almost 138 feet by 81 feet? And here’s a bit more high-flying trivia: The smallest kite in the world that actually flies is .196850 inches high; the longest kite in the world is 3,394 feet long; the longest “kite fly” is 180 hours; some Japanese kites weigh over two tons; the highest a single kite has ever flown is 13,600 feet above sea level; and the fastest recorded speed of a kite is over 120 mph.
The purpose of the first kites flown thousands of years ago was to lift offerings and give thanks to the gods for good harvests, weather, and prosperity.
When it comes to world history, kites were used in the American Civil War to deliver letters and newspapers; large kites were banned in East Germany so a man couldn’t be lifted over the Berlin Wall; kite flying was banned in China during the Cultural Revolution and those found flying a kite were remanded to jail for up to three years and their kites destroyed; and of course we have all learned that our own Benjamin Franklin used a kite to verify that lightning was, indeed, electricity.
History and fun-facts aside, just pick a day when a soft breeze strokes your face but doesn’t blow your hairpiece off. Now hold up a wet finger or watch tall grasses sway to and fro to verify which way the wind is blowing—and get the kids, your boyfriend, your bff, or go it solo—but just get out there and fly a kite!
And did you know that April is National Kite Month? It’s dedicated to the sport of kite flying, a venture co-founded by the American Kitefliers Association and the Kite Trade Association International. There are global kite events to help introduce people to the fun of kite flying, the rich history of kites, the stunning artistry of kitemakers, and how kites can be used as educational tools.
locations for kite-flying:

As easy as it may seem to find a place to fly a kite, there are many locations that do not allow kite flying unless it is a “regulated activity.” According to New York State Parks rules and regulations, kite flying is not permitted at any state park unless it is a regulated activity event; however, a park official stated it may be according to an individual park. If you do choose a state park and are asked to stop, please do so.
Many kite-fliers go to a local open field or school field when they are not in use. One local kiter says he flies at the DUTCHESS RADIO CONTROL FIELD on County Route 56 in Millbrook and at the New Paltz High School athletic field—provided neither have an event going on. Another kite enthusiast said he goes to KINGSTON POINT BEACH during the spring. It’s a hit or miss situation, but PUBLIC SCHOOL FIELDS, when not being used for sports or school events, and open fields and meadows, provided they are not private lands, are often available to kiters.
In addition, all the Department of Environmental Conservation Preserves allow kiting, but most don’t have open fields unless one hikes above the tree lines.

east of the hudson:
OLANA: The 250 acres of gorgeous, artist-designed (Frederick Church) landscape hosts a long hill, called the Sienghenburgh, that not only offers a spectacular view but is perfect for kite flying, which is welcomed. Open 8am to sunset daily, year round. There is a vehicle use fee of $5 per car on weekends and holiday Mondays April to October, from 10am to 4pm. All other times, admission to the grounds is free. The Olana Partnership of NY State Parks; 518-828-0135.
STONY KILL ENVIRONMENTAL EDUCATION CENTER:1,000 acres, mostly woods; however, there are areas that kites can be flown. Wappingers Falls. 845-831-1617; stonykill.org.
LONGDOCK PARK:A huge grassy peninsula jets out to the Hudson, perfect for kite flying. Beacon. 845-473-4440. scenichudson.org.
POET’S WALK:Incredibly picturesque park with open fields, gazebos, and trails. Red Hook. 845-473-4440. scenichudson.org.
HARRIER HILL PARK:Wide open meadows for kite flying. Gazebos for picnicking and family fun. Hudson. 845-473-4440. scenichudson.org.
east of the hudson:
ULSTER COUNTY COMMUNITY COLLEGE:The college campus presents an opportunity to liberate yourself—become ungrounded and enjoy the open space so perfect for kite flying. In fact, the college encourages kite flying as a de-stresser for students. 491 Cottekill Road, Stone Ridge. 845-687-5000; sunyulster.edu.
want to make a kite at home?
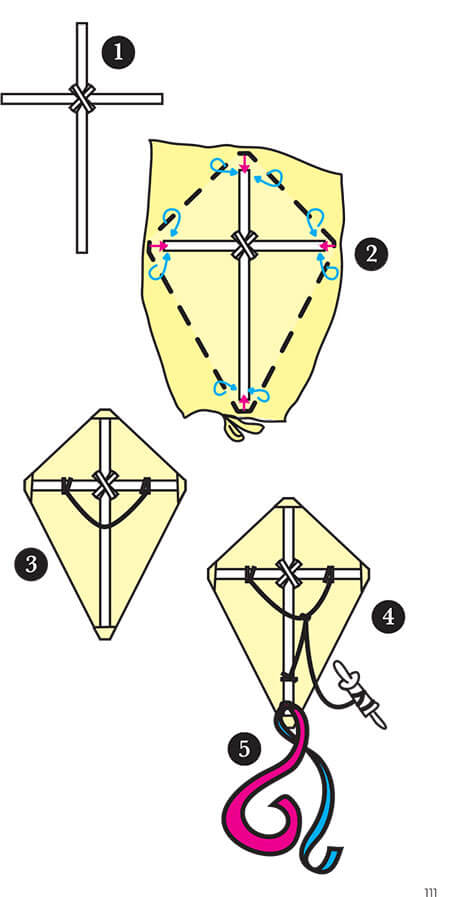
HERE ARE SIMPLE PLANS FOR A DIAMOND SHAPED KITE THAT KIDS CAN MAKE AT HOME.:You’ll need a large piece of paper or plastic garbage bag, butcher cord or thin garden twine, one 35” stick and one 40” stick (you can use garden stakes, dowels, straight twigs, or wooden skewers), scissors, strong tape or glue, and ribbon. Optional for decorations: markers, stickers, glitter, and more.
1.Take the two sticks and cross the shorter, horizontal one, called the “spar” about one-third down from the top of the vertical stick, called the “spine”. Now tie them together at the intersection with a piece of string by wrapping the string around the back of the main stick and then continually crisscrossing the string from front and back a few times—for a nice secure, non-wobbly fit. Make sure that both sides of the crosspiece are equal in width. If you want extra hold, put a dab of glue on the knot.
2.Lay the “sail” flat, or in this case the paper or bag, and if you want to decorate with markers or stickers, now is the time to do it! Then place the stick frame face down on top. Cut around it, leaving enough at the tips so that you can wrap the plastic around the stick ends. Then secure the wrapped plastic with tape or glue to hold in place on the stick. Make sure that it is tight.
3.Now, tie a piece of string on the horizontal stick halfway from the end to the vertical stick; leave a v-shaped slack of string that will look like an upside-down triangle. It should not be tight across, leave the slack. Then knot-tie the string on the right side of the vertical stick halfway to the end.
4.Then tie the end of a big ball or a “reel” of string to the bottom portion of the vertical stick (this is the bottom of your kite) and loop it up and around the slacked string, tying a simple knot at the intersection of the two strings (so it forms a triangular pyramid shape). This is called the “bridle”.
5.Next, take your brightly colored ribbons and tie a couple of 2-foot lengths to the end of the kite to help balance it. This is called the “tail”. You may wish to attach a small weight, like a simple metal washer, if the ribbons don’t seem heavy enough for your kite.
TEST IT OUT ON A WINDY DAY.


