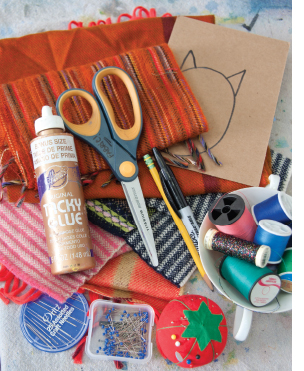
Create your very own stuffed owl (or any creature you can imagine) using those worn out jeans, your wool sweater that accidentally shrunk, or that shirt with a stain just a bit too big to ignore!
We love using recycled textiles to create little, stuffed creatures, and we believe that ANYONE CAN SEW!
Just jump in, give it a try, and embrace the imperfections—they’re the very details that give our little stuffed friends such personality.

Materials
Fabric scraps* (You’ll need at least two pieces larger than your template, as well as some extras for the eyes and beak and whatever else you decide to add.) Needle & thread
Pins
Stuffing
Sharp scissors for cutting fabric
Marker or tailor’s chalk
Scrap paper, cardstock, or chipboard
Craft or fabric glue (optional)
*A note about materials: if you choose to use knit or woven fabrics, like sweaters or scarves (and they’re not already felted by accident), make sure they are mostly wool, and then throw them in the washer and dry them. Now they’ll hold up while you’re sewing!

Instructions
1. Create your template
Start by drawing your owl (or any animal you want!) on a piece of scrap paper. (When drawing an owl, I like to start with an oval and add two little triangles for ears.) Cut around the outline of your shape to create a template.
Note: your sewn pieces will be smaller than your drawing — so make your template a bit larger than you’d like your finished friend to be.
2. Cut your fabric
Place your paper template on your first piece of fabric and trace around the edge with a marker or chalk. Cut out your owl shape from the fabric. Using your first fabric shape as a template, lay it down on your second piece of fabric, trace, and cut. You should have two pieces of the same shape.

3. Pin & Sew
Match up your two pieces of fabric, making sure the sides you want to show on your owl are facing out. Pin the two pieces together using straight pins. Using a straight stitch (up and down), sew around the edge of your owl, stopping before you get back to where you started. You’ll want to leave yourself a hole large enough to insert stuffing.

4. Stuff & Finish Sewing
Start by inserting stuffing into the ears (you can use a pencil or chopstick to help you), then add more stuffing until your little creature is as plump as you like; just make sure you can still close her up! Using a straight pin, close the opening and continue sewing until you reach your starting point. Make sure to tie a good knot to secure all that sewing you just did.

5. Glue or stitch a face
Now that you’ve got your basic shape, it’s time to bring your little creature to life! Grab some fabric scraps, and cut circles for eyes and a triangle for a beak. Play a bit — move the pieces around, make them smaller, cut new ones that are bigger — until you like the face you’ve created. Then, glue or stitch the features onto your stuffed shape.

6. Hug your new friend, or keep on crafting!
Congratulations! You just created your very own stuffed friend! Keep it just the way it is, and give it snuggle. Or, craft on — give your little friend some wings, a bow or bowtie, eyelashes, decorative stitching — anything you can imagine!

We hope you’ll share your cute creations on our Facebook page!
fiberflame studio
1776 route 212, saugerties, ny 12477
845-679-6132 | fiberflamestudio.com

